Unior's wheel tension balancing app or wheel tension app (WTA) is an online tool and was designed to be used with Unior 1752/2 spoke tension meter. To use the app, please read this instruction carefully, follow the steps and use guidelines from the app’s tooltips under each section, marked as (i).
In the starting section, under boxes number 1 and 2, you must first select spoke settings. Define spoke shape and spoke dimensions. All spokes that are included in Unior 1752/2’s tension tables inside the tool’s manual will be listed as an option in the drop-down list. You can select between round and bladed (aero shaped) spokes and note that some spokes inside the list are double butted. If the spoke you are using is not included the drop-down list, the closest alternative (dimension wise) is suggested, however be aware that readings nor calculations will not be exactly on point.
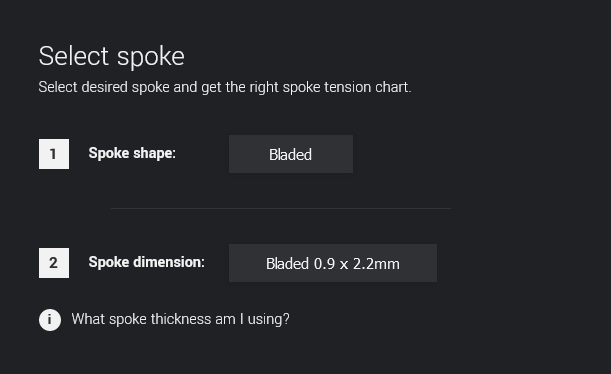
Note: Unior 1752/2 tensiometer also features a spoke thickness gauge, which helps with the whole process. Simply insert the spoke in one of the upper openings and read the spoke thickness value.
Once spoke settings are defined, meaning the spoke shape and dimension is selected, the specific factory conversion chart or tension table will be preloaded and shown to the user. This serves you as a guide point on how to translate your tension meter scale readings into the actual tension applied on the spoke.
Note: A conversion table or spoke tension table translates your tension meter scale into real tension values. Simply insert a spoke into your spoke tension meter and compare scale readings with tension values in kgF on your conversion table.

Selected spoke tension table will also be loaded into the tension app itself so once you start taking readings around the wheel, actual tension values will be calculated accordingly to the conversion table.
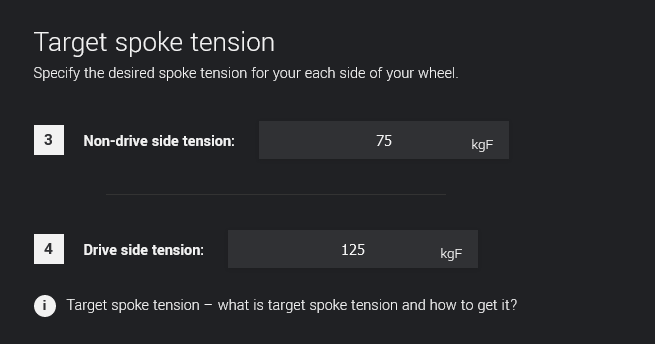
In the second, Target spoke tension section, specify the desired spoke tension for each side of the wheel. Please note that this section is not required for the wheel tension app to work. However, once you specify drive and non-drive side target tension, based on tension meter readings, actual tension deviations (in %) can be derived. Having this data, you will have a more complete information regarding tension variation across spokes on each side of the wheel.
Note: Calculate the spoke tension distribution for your wheel. Spoke tension calculator will help you get the correct spoke tension.
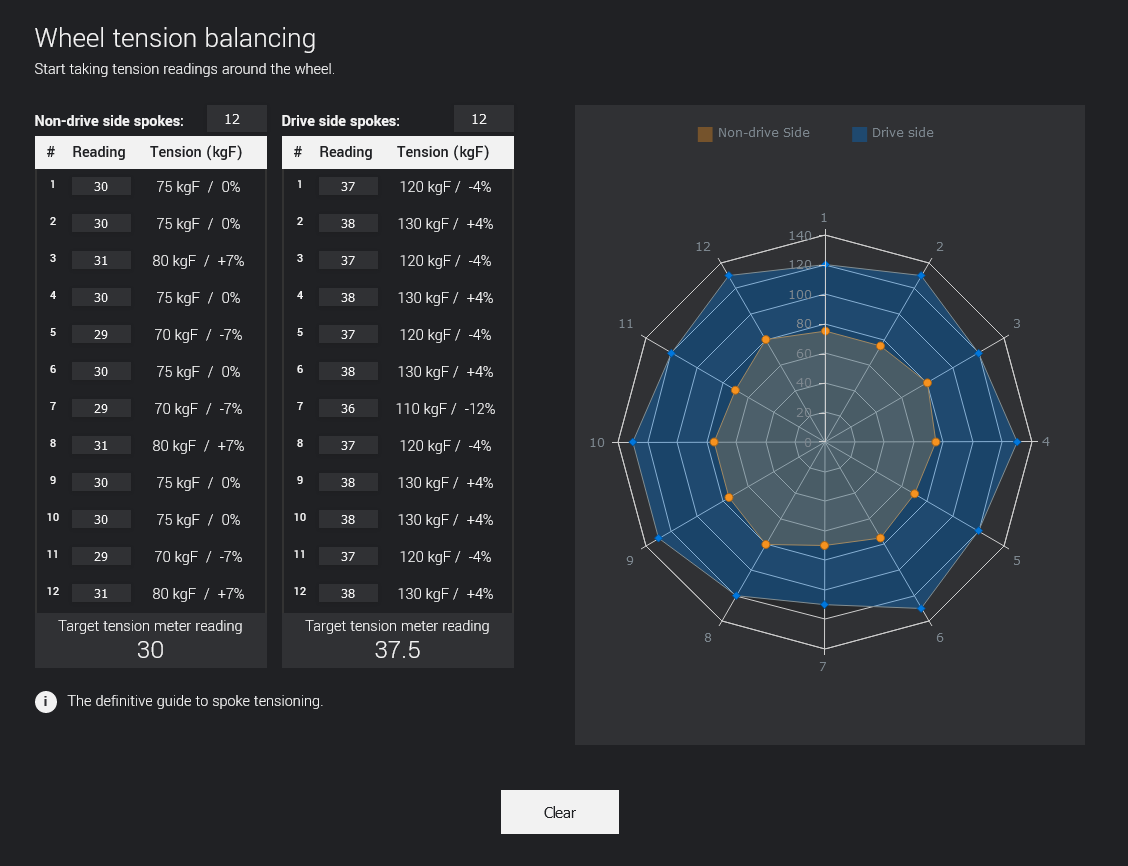
From here on you can start taking tension readings around the wheel with your Unior 1752/2 tensiometer.
First, specify the matching spoke count on each side of the wheel so that the correct number of tension readings inputs appear. Once you select the spoke number on each side, a so-called radar chart should also appear closely to these two tables.
Have you selected target tension for drive and non-drive side of the wheel prior to that, there should also be a Target tension meter reading number under these two tables. This should give you a guideline what value on tension meter scale you are after for each side of the wheel.
As you move around the wheel, start taking tension meter readings for one side of the wheel at a time. Based on preloaded tension table from the first step, the actual tension on the spoke will be automatically calculated in kgF with deviation in % from the target tension stated as well. The radar chart nearby should be plotted instantaneously as you go.
Note: When taking readings, use the ENTER key on your keyboard to move from one input field to another.
Note: The main goal is to get the tension across each side of the wheel as even as possible and as close to target tension that was calculated in the second step as you possibly can.
Use the radar chart in combination with calculated spoke tension deviations (%) to inspect the variation in tension on each side of the wheel. Higher the tension on the spoke, farer the point on the radar chart from the centre will be plotted and vice versa.
Once you finish taking readings and all tension calculations are made, take a moment to inspect the radar chart and the summary tables at the bottom of the page. Inspect the deviation degree of your average spoke tension from specified target tension and variance in spoke tension readings. Minimum and maximum spoke tension values also serve as a good indicator of weak points of the wheel, sometimes suggesting rim defects. If you make a correction on the spoke and refresh a tension reading in the tension app above, the summary tables will be updated accordingly.
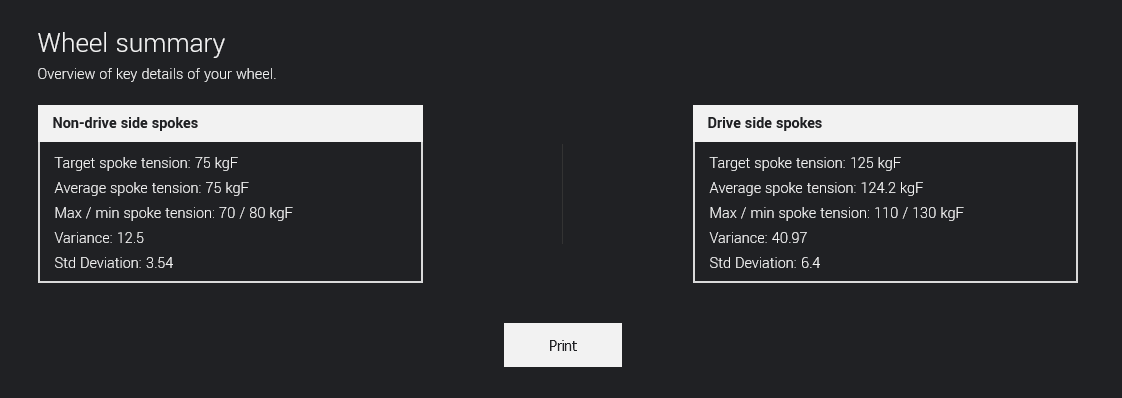
You can now proceed to the Print Sheet page where the wheel data summary will await you. Besides keeping such a document for your archive and servicing purposes, as a master wheel builder, the tension app summary document will also serve you as a quality certificate of your hand work. Be proud of it!

© Copyright - SpokeCalc
https://spokecalc.io